Core Features
- 09 Nov 2022
- 3 Minutes to read
- Print
- DarkLight
- PDF
Core Features
- Updated on 09 Nov 2022
- 3 Minutes to read
- Print
- DarkLight
- PDF
Article summary
Did you find this summary helpful?
Thank you for your feedback!
Drilldowns
When viewing a data response/query result, there may be times where a user wishes to uncover the details underlying a given data point. To do so, users can easily “drill down” in a single click to access these details.
What is a drilldown?
To drill down means to surface or access a deeper level of information —or uncover the underlying details —that make up a given data point.
To leverage the “drilldown” feature, enter a natural language query in the query input bar, or click on a query you’d like to ask in the Explore Queries view. Once the query has run, a data response will be returned.
Determine which data point you are interested in drilling into and then click on that particular line item or detail. When you click on a data point to drill down, an additional "drill down query" will be automatically generated and a detailed data response will be returned to you within seconds.
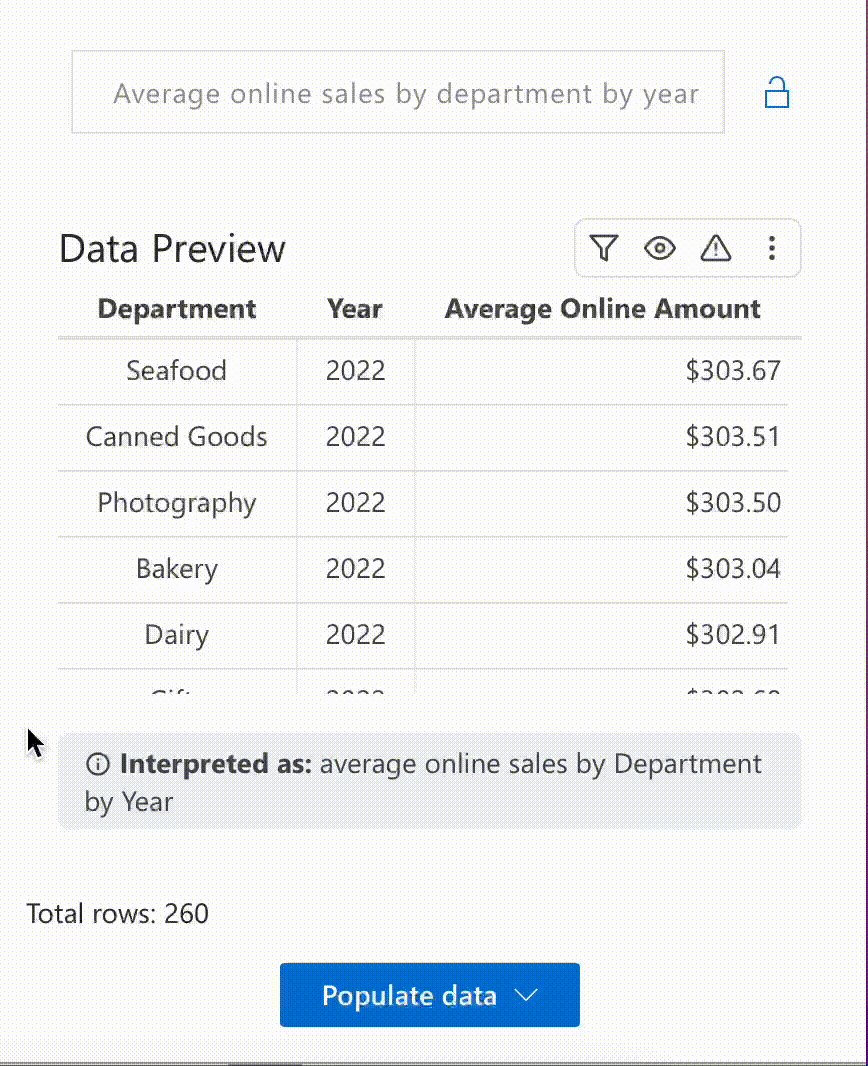
Interpretation “Interpreted As” Statement
When a data response gets returned, you will see a data response, followed by a text statement preceded by “Interpreted as”.
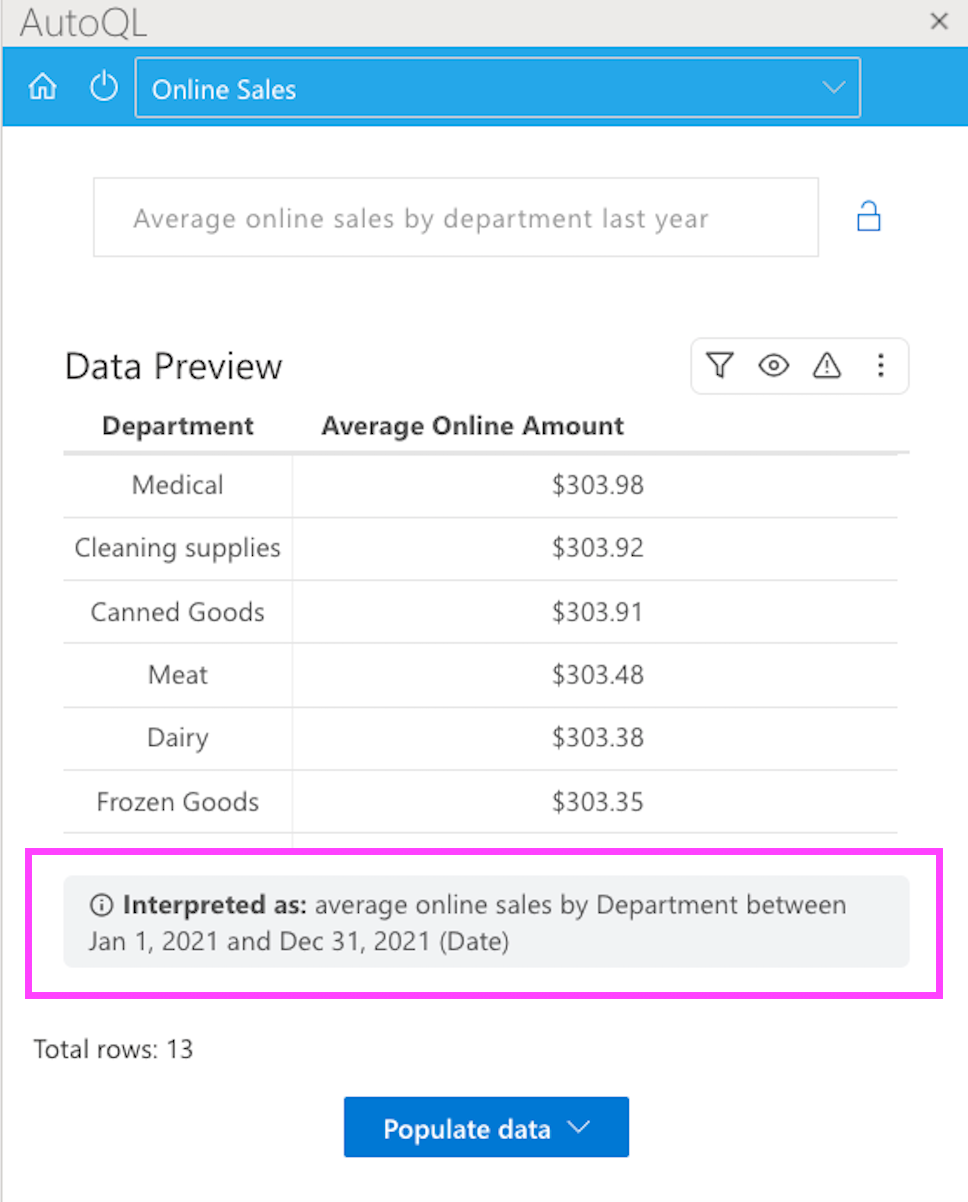
This text statement provides a plain-English interpretation of how your query was understood by AutoQL, including helpful context that shows the relationship between filters/value labels in the query and their corresponding column in the database.
Each Interpretation/ ”Interpreted as” statement displays filters/value labels with their corresponding column header in brackets.
Managing & Locking Filters
When querying with AutoQL, you may wish to apply filters to help you narrow down results, cut through excess noise, and gain critical insights, faster.
Managing filters allows you to “lock” specific filters so that only the specific data associated with that filter will get returned.
This feature is particularly useful in helping narrow down or focus on something particular in the query results. This can also be thought of as “subsetting” the data.
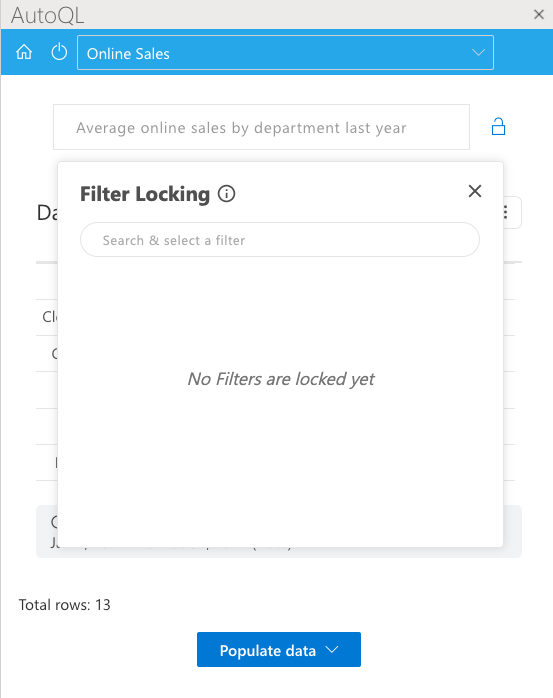
Accessing the Manage Filters Menu
To access the Managing Filters menu, click on the lock icon in the top right corner of the Task Pane (next to the Query Input Bar):
This feature allows you to to set your own filter preferences and retain those preferences for the duration of an entire session (session-specific), or to set filters that get retained between sessions and are applied on an ongoing basis over time (persistent). These Lock Settings are described further below.
How to Lock a Filter
To lock a filter:
Navigate to the Filter Locking menu
Begin typing in the search bar to find the filter you wish to lock. See example below:
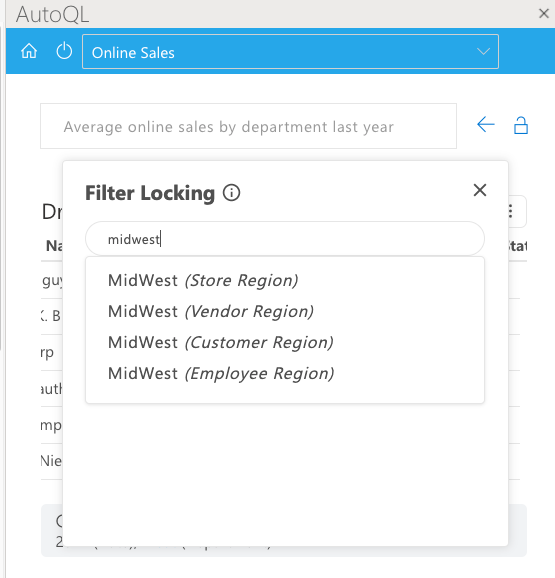
Click on a filter to apply/lock it. That filter would then appear in the menu of locked filters below, like this:
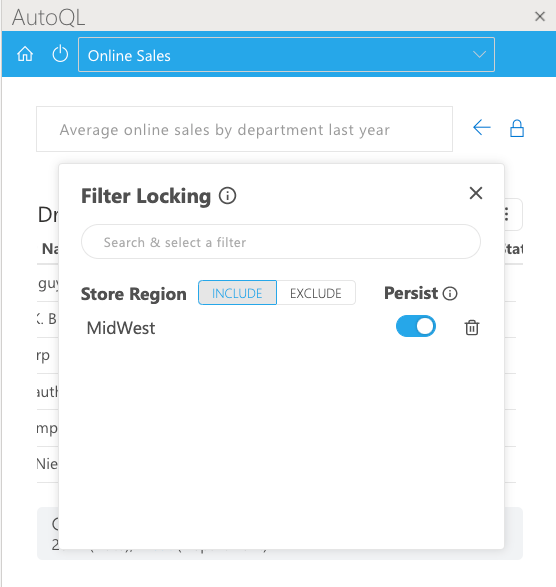
Now that a filter has been locked, any subsequent queries you asks will automatically factor that filter in.
Note: Locked filters become visible in the “Interpretation” statement that follows a data response. These can be identified by looking for blue text preceded by a lock icon.
Lock Settings: Persistent & Session-Specific
Filters can be locked on a persistent or session-specific basis.
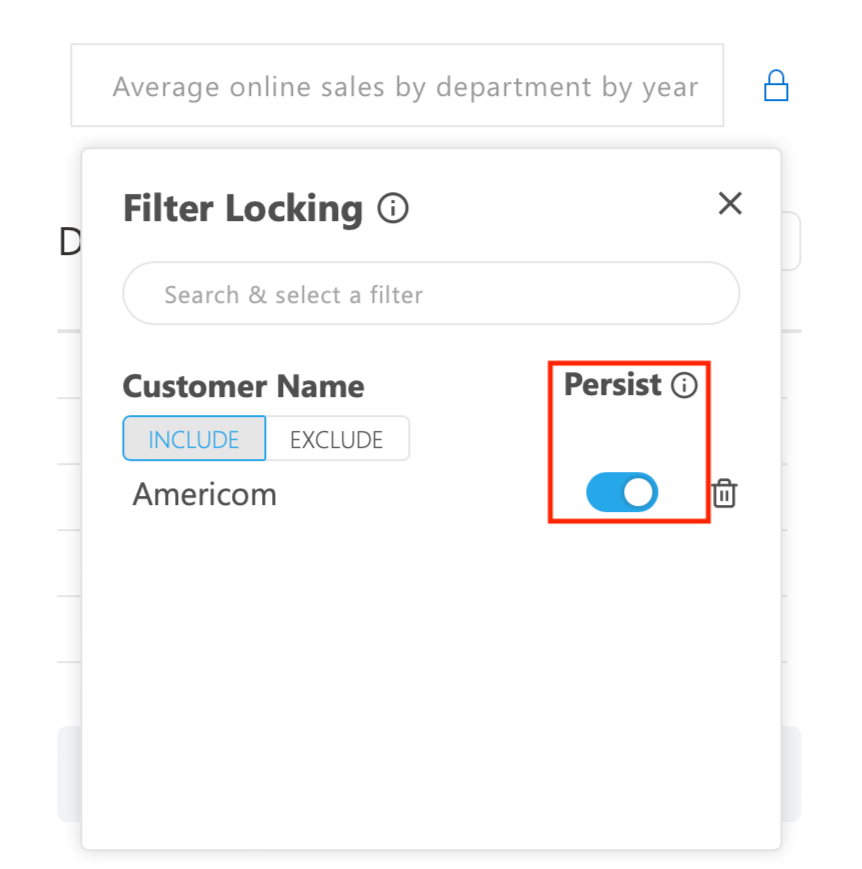
Persistent:
Filter is locked on a persistent basis unless it gets removed, meaning the filter will remain locked between sessions, so you can pick up where you left off when you return to AutoQL.
Session-Specific:
Filter is locked for the current session only. If you leave the AutoQL Add-In or close your browser and start a new session, the locked filter won’t be retained.
Removing/Unlocking a Filter
If you wish to remove a filter that has been locked or to view filters you have locked, simply click on any filter within an “Interpreted as” statement, or click into the Manage Filters menu at any time.
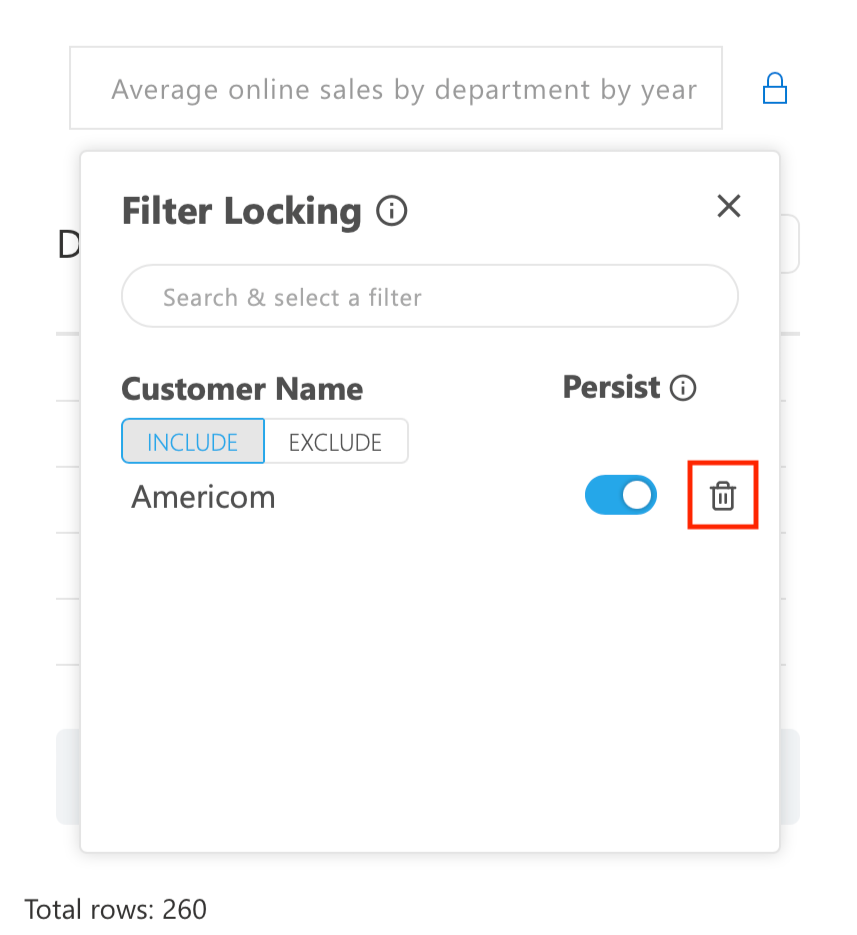 To unlock/remove a Filter, click on the small X icon in the locked filters menu.
Was this article helpful?